Upload Files to the Vault
Learn how to upload your documents to the PASSPort Vault.
Be aware that the PASSPort Vault is a shared space for users from your organization. Your colleagues will be able to view documents you upload.
- Confirm you understand document retention policies
- Select files to upload
- Edit document information
- Set your upload folder
Confirm you understand document retention policies
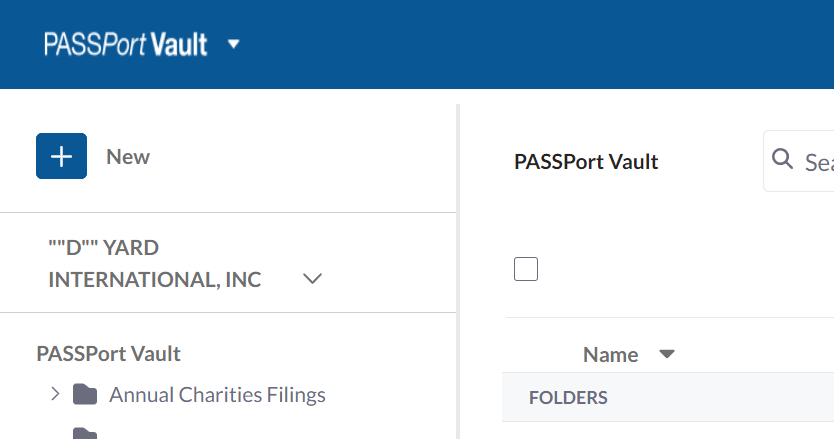
Log into PASSPort and switch to PASSPort Vault.
Click the + New button at the top of the left sidebar. A drop-down menu appears.
Select Upload Document from the drop-down menu.
Click the Confirm and Proceed button to confirm you understand that uploaded documents cannot be deleted from the PASSPort Vault, due to New York City government retention policies. The Upload Document pop-up appears.
Select files to upload
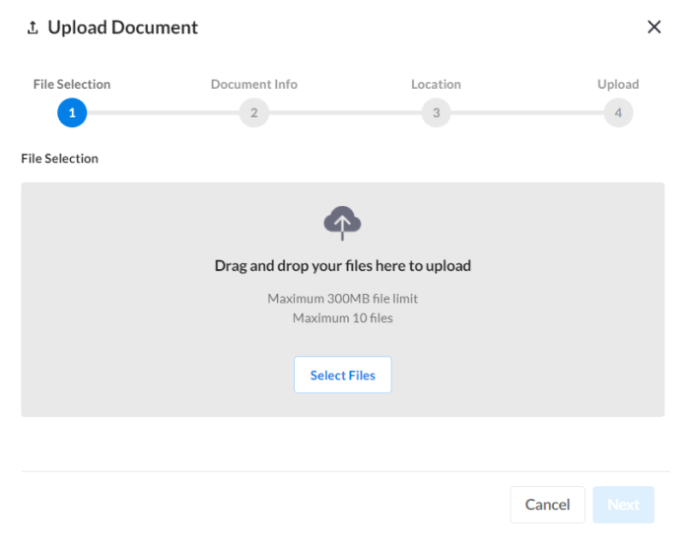
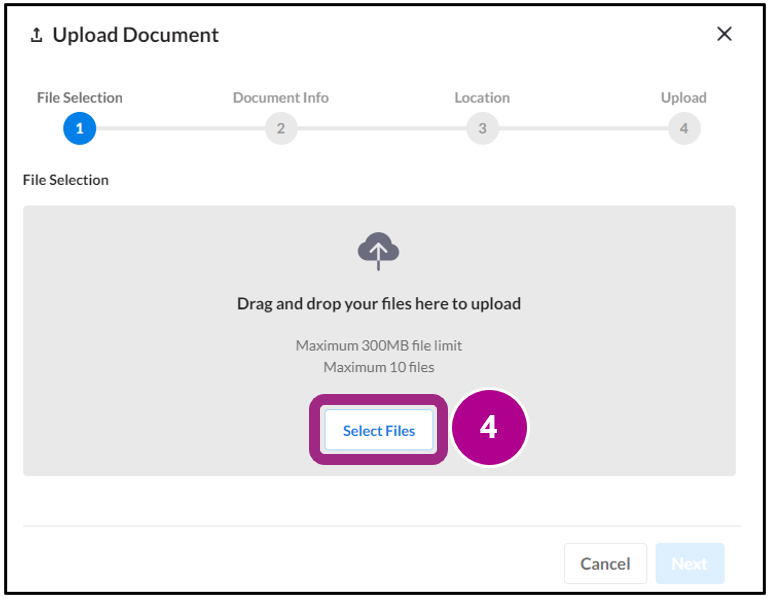
In the Upload Document pop-up, click the Select Files button.
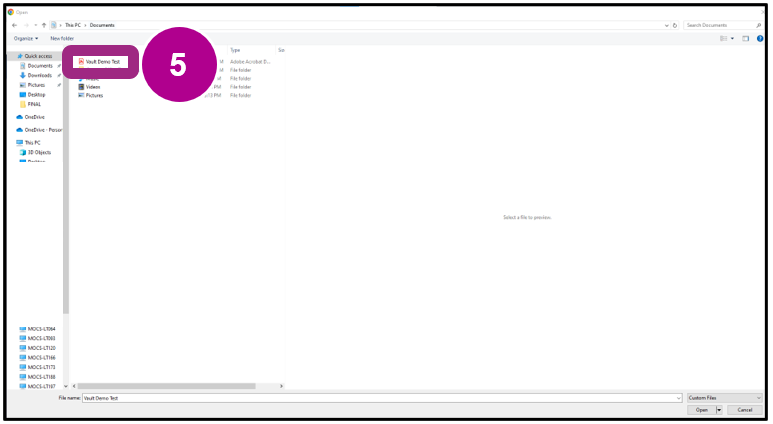
Select documents to upload from your computer.
- Up to 10 documents can be uploaded at the same time
- The file size limit is 300MB
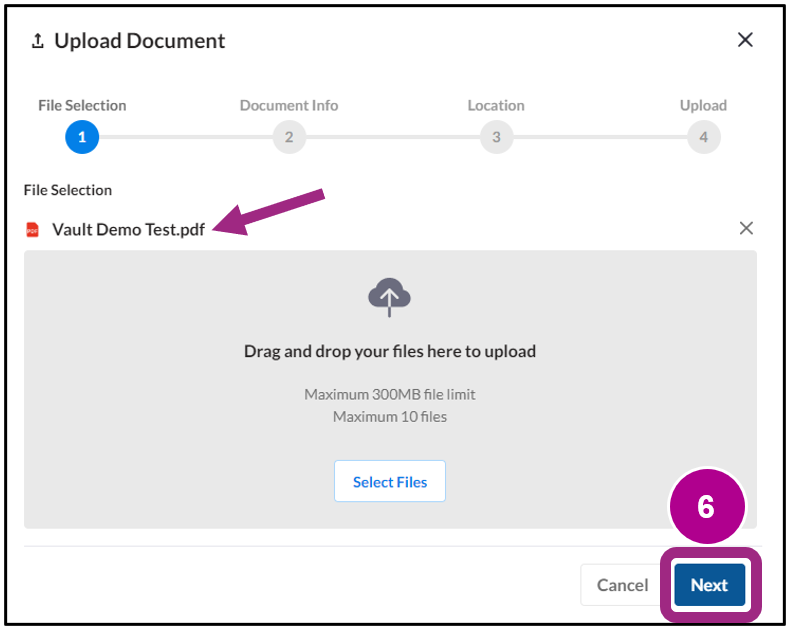
The documents you select are listed under File Selection in the Upload Documents pop-up.
- If you want to remove a listed document, click the X icon to the right of the document.
Click the Next button to proceed to the Document Info step.
Edit document information
Editing your document information is optional, but beneficial to keeping organized. You can edit this information for each of the maximum 10 documents you are uploading.
Document name
If you want to overwrite the current name of your document, click the Document Name field and enter a new name. Make sure the document name:
- Is less than 50 characters including spaces
- Does not contain special characters except these ( ) . _ -
- Does not have the same name as an existing document in your PASSPort Vault
Document type
Click the Document Type field to open a drop-down menu of categories. The document type:
- Identifies files to make them easier to find in PASSPort Vault
- Is used to confirm task completion
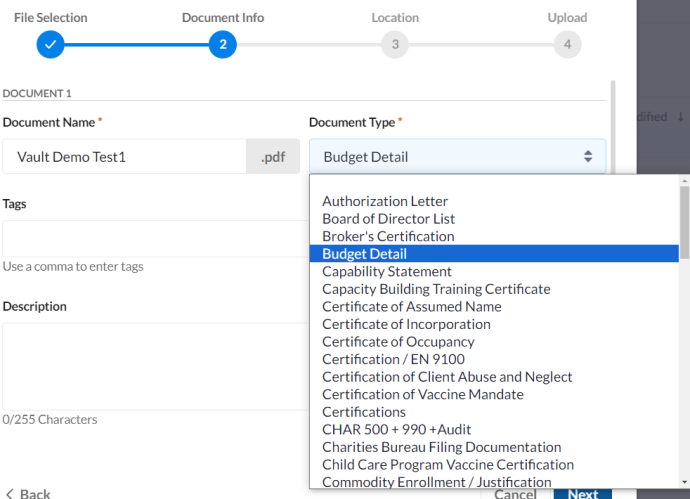
Select your document type in the drop-down menu.
Tags
If you want to add tags to your document, click the Tags field. Tags:
- Help you search through your documents
- Are only visible to users in your organization
- Can be added and edited at any time
- Are optional
Enter a tag name in the Tags field, followed by a comma. Repeat to add multiple tags.
When adding a tag, think about words you or your colleagues would use to search for the document.
Description
If you want to add text information about a document, click the Description field and enter a description of the document.
Review your document information, then click the Next button to proceed to the Location step.
Set your upload folder
Review the folder name listed under Folder Location.
This folder is where your documents will be uploaded. Documents can be moved to other folders after upload.
If the folder is not where you want to upload your files, click the Select New Location button and follow the prompts.
If the folder is where you want to upload your files, click the Next button. A message appears, confirming successful document upload.
Last updated: August 30, 2024
Upload a Document in the Vault
Learn how to upload a document to the PASSPort Vault.
The Vault is a shared space with users from your organization.
Do not upload documents you wouldn't want your colleagues to be able to view!
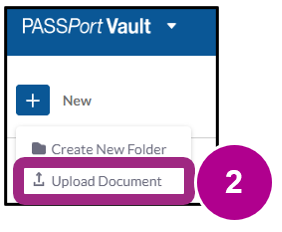
- Click the + (New) button.

- Select Upload Document from the drop-down menu.
- Read the confirmation message in the pop-up window,
then click the Confirm and Proceed button.
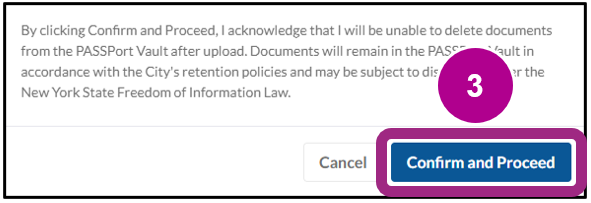
Important: By clicking the Confirm and Proceed button, you acknowledge that you understand the document cannot be deleted from the PASSPort Vault once uploaded. Documents can be transferred within the Vault to an Archive folder, but the New York City document retention policies do not permit deletion of documents submitted to PASSPort.
- The Upload Document pop-up displays.
Click the Select Files button.
- Select the document(s) of your choice.
The upload limit is 300MB. Up to 10 documents can be uploaded simultaneously, as long as the documents combined do not exceed 300MB.
- If the correct document displays under File Selection, click the Next button.
If not, click the x to remove it, and upload the correct document.
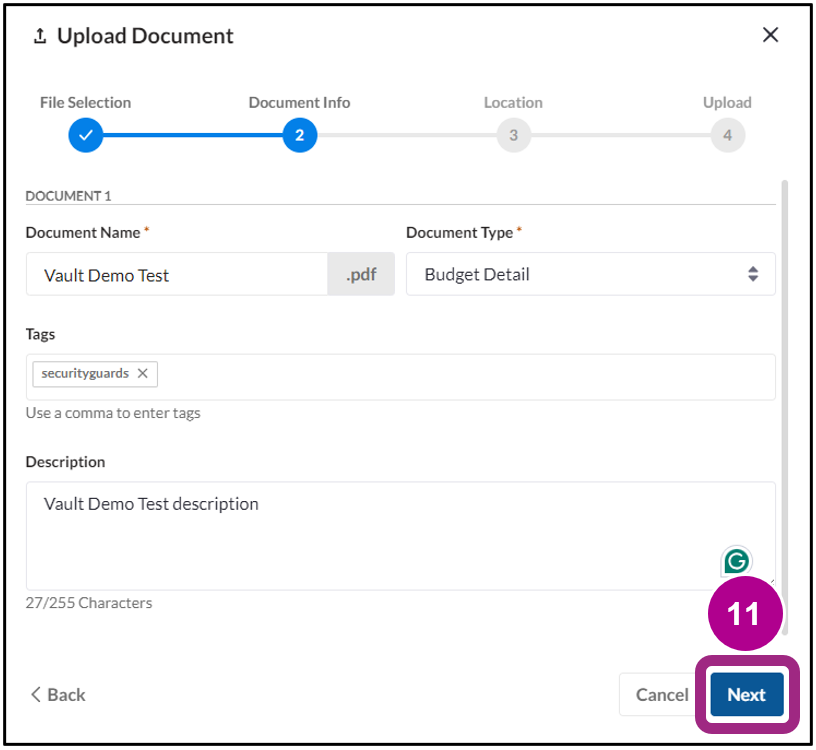
- Optional: Rename the document according to the appropriate naming convention.
Click the Document Name field to overwrite the current name.
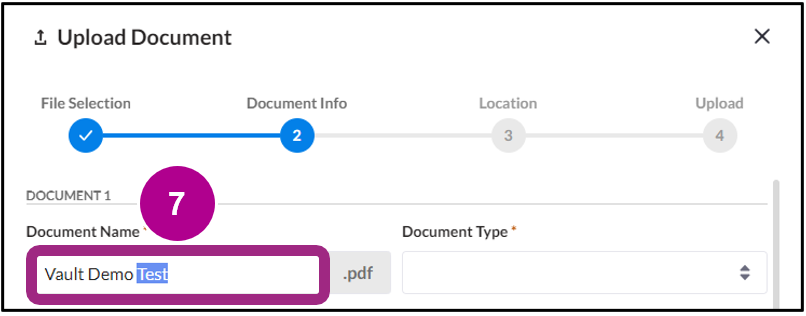
Important: To avoid blocking messages, ensure that the document name:
-has less than 50 characters in length, including spaces
-does not contain any special characters, except these: ( ) . _-
-is unique (does not have the same name as an existing document)
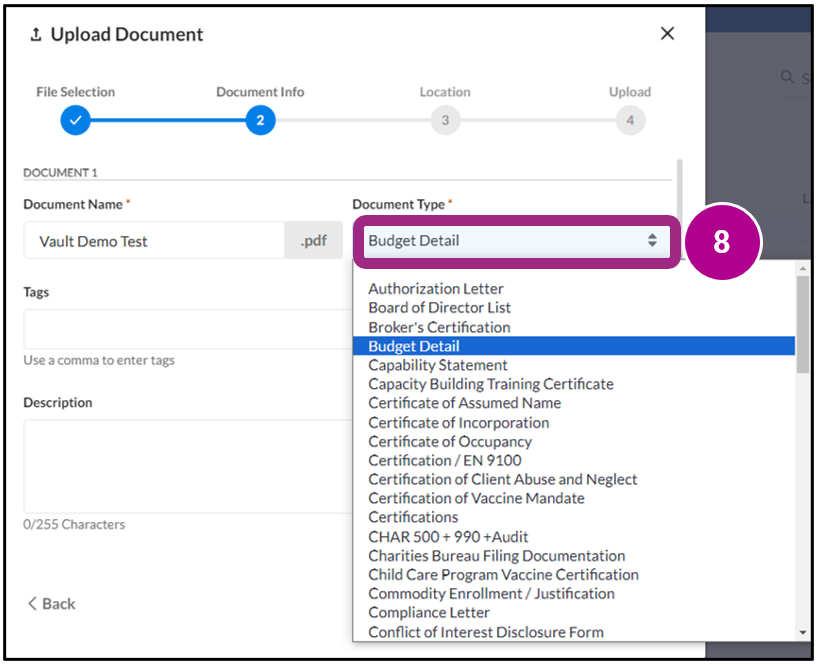
- Select the appropriate Document Type from the drop-down menu.
Document types help identify documents and make it easier to find documents in the Vault. It is crucial to select the correct document type as PASSPort confirms task completions based on document types.
- Optional: Make finding documents even easier – add tags!
Tags work like keywords to help you search for documents. Tags are optional, only visible to users at your organization, and tags can be added and edited at any time.
To add a tag, enter a tag name in the Tags field, followed by a comma (“,”). Repeat to add multiple tags.
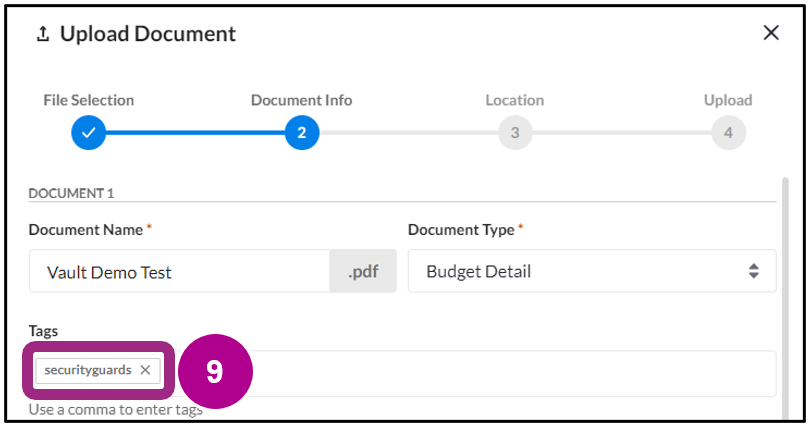
Tip: When naming a tag, think about how you or a colleague of yours would search for that subject. For example, “securityguards” for documents related to a security guard contract might be more effective than “contractdoc.”
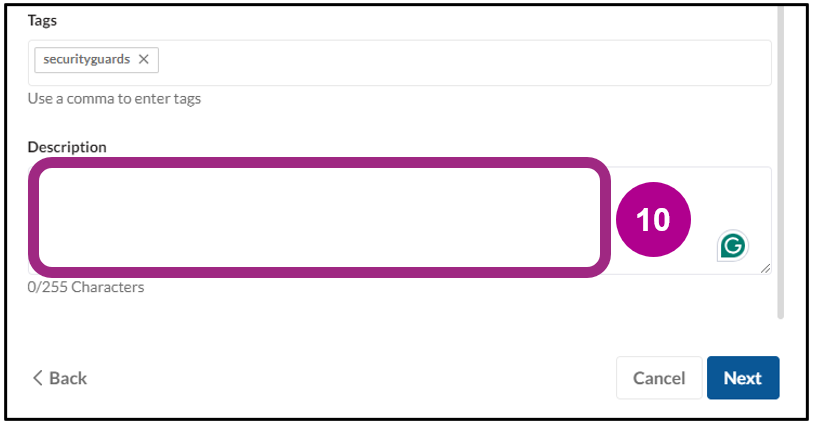
- Optional: Enter a Description.
Descriptions are recommended; they are useful to capture important information about a document.
11. Review all the document information for completeness and accuracy, then click the Next button.
12. If the Folder Location is correct, click the Next button.
The folder location is the folder into which the document will be uploaded.
The document can be moved to another location after upload.
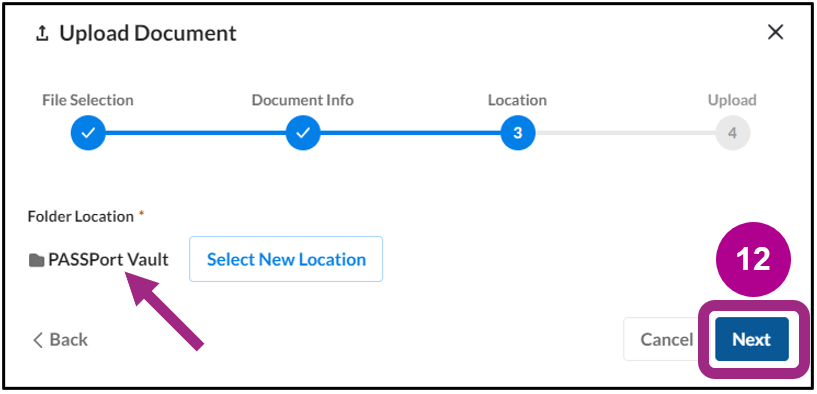
Note: The default upload location is the folder that is currently open when initiating the upload process. To change the location, click Select New Location and follow the prompts.
13. The document has been successfully uploaded to the Vault, as indicated by a green confirmation message.

Click/tap or press the enter key on a question to display the answer.
What types of documents can be uploaded?
The PASSPort Vault will accept most standard file types (.doc, .docx, .rtf, .xls, .xlsx, .ppt, .pptx, .txt, .tif, .jpeg, and .pdf). Documents that do not exceed a file size limit of 300MB can be uploaded.
What documents should not be uploaded?
- Do not upload documents you don't want your colleagues to be able to view.
Remember the Vault is a shared space with PASSPort users from your organization. - Do not upload documents that are unrelated to doing business with the City of New York.
- Unless required for contracting activity, do not upload documents containing personally identifiable information, such as your home address, phone number, or social security number.
Who can view uploaded documents?
All users with access to the organization’s PASSPort account can view the contents of the organization’s Document Vault.
Is there a file size limit?
Yes. File sizes cannot exceed 300MB. Up to 10 documents can be uploaded simultaneously, as long as their file size does not exceed 300MB combined.
Can I upload more than one file at the same time?
Up to 10 documents can be uploaded simultaneously, as long as their file size does not exceed 300MB combined per upload.
Is there a document name character limit?
50 characters in length, including spaces.
What does this error message mean: “Document name exceeds maximum character length”?
The document name is too long. Shorten to under 50 characters, including spaces.
What does this error message mean: “Please choose a different name”?
A document with the identical document name already exists in the Vault. Rename the document.
What does this error message mean: “Valid characters are letters (A-Z, a-z), numbers (0-9) and the following special characters ( ) . _- “?
Your document name contains an invalid character. Rename the document.
Is there a character limit for the document Description text?
255 characters, including spaces.
Are there any restrictions regarding document Tags?
Tags should be all lower case, one word, no spaces, no hyphens, and no punctuation.
Why do duplicate records of documents appear in the Vault in pdf format?
PASSPort makes PDF versions of uploaded documents related to solicitation and contract processes. Contract documents required for registration with the Comptroller’s Office are automatically converted into PDF format.
Can I edit the document information after uploading a document?
- Document Name: Yes, a document name can be changed. However, once a document has been submitted as part of a task or business process in PASSPort, its name cannot be changed.
- Document Type: No, the document type cannot be changed. If necessary, archive the document with the incorrect type, then upload a new document with a different name and the correct document type.
- Document Tags: Yes. Tags can be added and deleted at any time.
What do these error messages mean: “File couldn›t upload” and “Upload could not be completed”?
The file could not be uploaded. The most common reasons why uploads fail are a lack of internet connectivity or other transmission errors.
Why am I required to enter a validity date? Some document types require the entry of a validity date. Example: A certificate of insurance or a CHAR500 document has a start and end date and thus require the entry of a validity date.
What should I do if I get this error message: “Date field is invalid”?
Ensure the end date field (To: field) does not contain a date that’s earlier than the start date (From: field).
I don’t see the “Next” button. Why? Scroll down the page or zoom out to view the Next button. You can zoom out by pressing and hold the “Ctrl” key while pressing the “–“ (minus)” key.
Can I upload a folder?
No. Instead, create a folder in the Vault and upload all necessary documents into the folder.


