Upload or Link Documents
Learn how to upload and link documents in your contracts, invoices, requisitions, and more.
Note: The screenshots used in this guide show the steps an agency user would take to upload and link documents to a contract. However, both agencies and vendors can apply these steps to any process or task including RFx, invoices, and more.
Important: If you are uploading or linking a document as part of a task in PASSPort, documents cannot be removed (unlinked) after the task is submitted. Be sure you are uploading/linking the correct document(s) with the correct document type before submitting or approving the task.
-
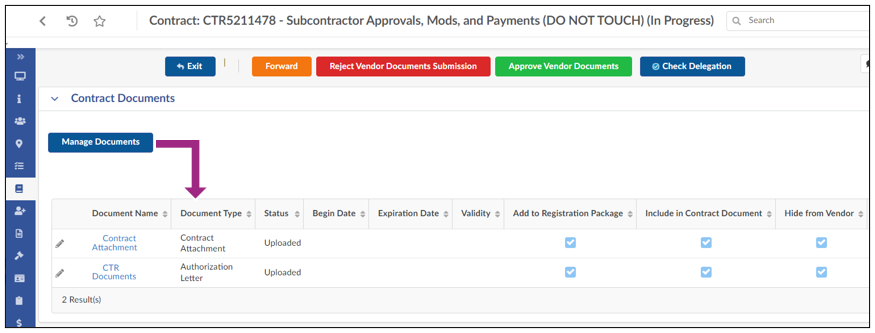
Locate the process or task to which you want to upload or link a document.
Click the Manage Documents button.

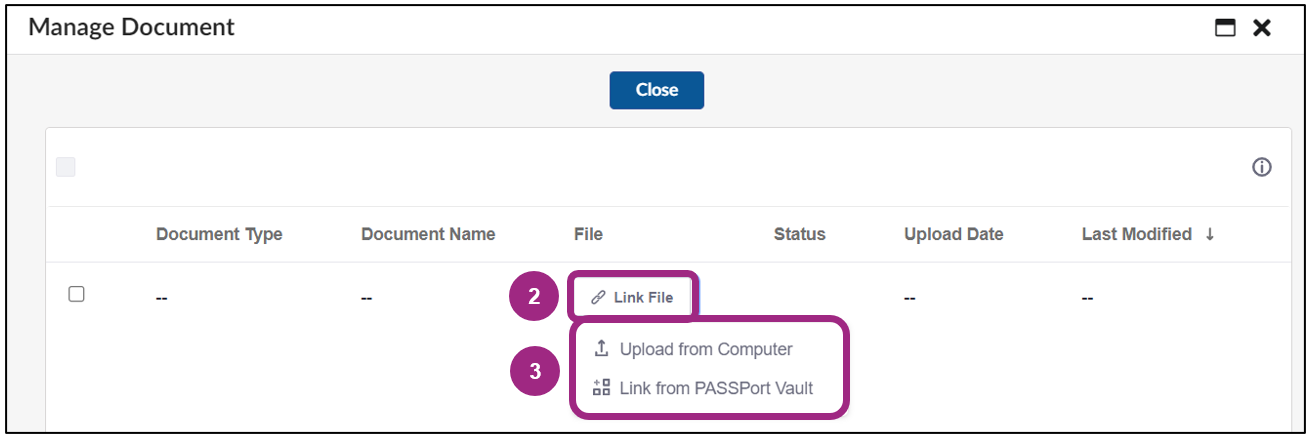
The Manage Documents window opens.
- Click the Link File button.
- Select either the Upload from Computer or Link from PASSPort Vault option.
Upload from Computer
-
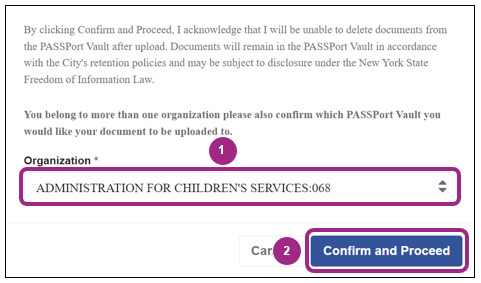
Read the confirmation message that appears.
If you belong to multiple organizations, select the Organization from the drop-down.
- Click the Confirm and Proceed button to acknowledge that you understand documents cannot be deleted from the Vault after upload.
-
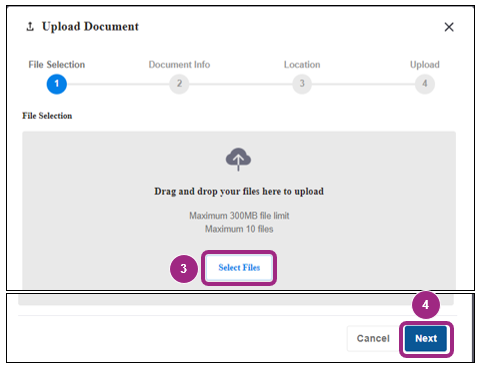
In the Upload Document window, click the Select Files button to add a document from your computer.
Note: Up to 10 documents can be uploaded simultaneously, as long as the documents combined do not exceed 300MB.
- Once the file is selected, click the Next button.
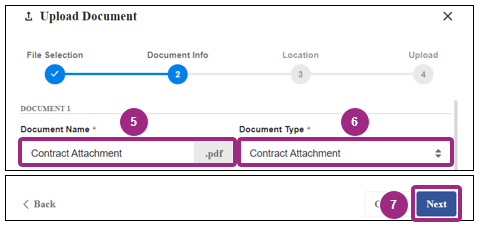
- Edit the Document Name, if necessary.
- Select the Document Type from the drop-down field.
Important: The Document Type cannot be changed. When uploading documents, carefully review your selection and be sure it matches with the type of document intended for upload. -
Click the Next button.
By default, the document is saved to a folder named PASSPort Vault.
- Optional: Click the Select New Location button to save the document to a different folder.
- Click the Next button.
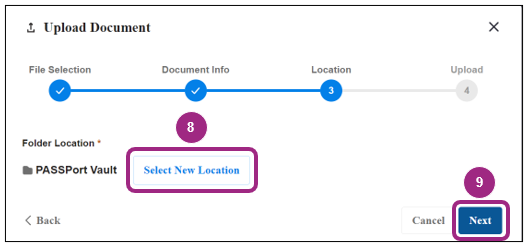
The Upload Document window closes, and the newly uploaded document appears on the Manage Documents window.
Link from PASSPort Vault
On the Link from PASSPort Vault window, all documents in your organization's Vault are visible.
You can search for documents using the search bar or filter by Organization (if you belong to multiple organizations), Location in the Vault, or Document Type.
-
Once you locate the document you want to link, click the radio button in the left-most column.
Note: Only one file can be linked at a time.
-
Click the Select button at the bottom of the window.
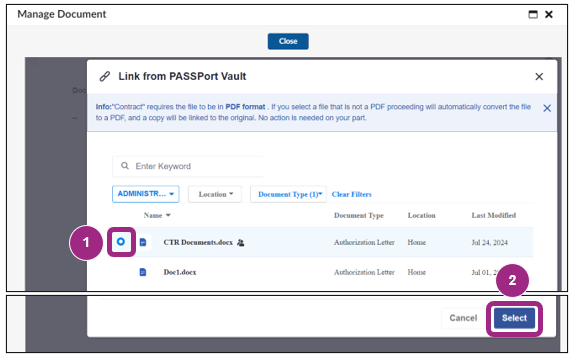
The Link from PASSPort Vault window closes, and the newly linked document appears on the Manage Documents window.
Repeat the steps in this section to link additional files.
Note: If a non-PDF document is uploaded or linked from the Vault, the document is automatically converted to PDF and a copy will be linked to the original.
- Click the Close button to return to the main page.

Documents are visible in a table below the Manage Documents button.
